
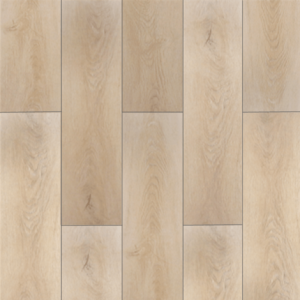
Laminate flooring has emerged as a popular choice among Canadian homeowners, appreciated for its durability, aesthetic appeal, and cost-effectiveness. With the right installation techniques, laminate flooring can transform any space into a warm and inviting environment. This complete guide provides insights into the installation process, ensuring your flooring project is executed smoothly and efficiently.
Understanding Laminate Flooring
Laminate flooring is a multi-layer synthetic product fused together with a lamination process. It simulates wood with a photographic applique layer under a clear protective layer. The inner core layer is usually composed of melamine resin and fiberboard materials. Here?s a breakdown of why it?s highly preferred:
- Affordability: Compared to hardwood or stone, laminate is budget-friendly.
- Versatility: Available in a variety of styles and colors, it can mimic different materials.
- Durability: Resistant to scratches, moisture, and wear.
- Ease of Installation: With a click-lock design, it?s perfect for DIY enthusiasts.
For more on laminate flooring options, discover expert strategies here.
Preparing for Installation
Gathering the Necessary Tools
Before starting the installation, ensure you have the following tools:
- Measuring tape
- Utility knife
- Rubber mallet
- Laminate flooring cutter or saw
- Spacers
- Pry bar
- Tapping block
Each tool plays a crucial role in the installation process. For detailed insights into their uses, explore advanced guides and tips.
Acclimating the Flooring
Allow the laminate planks to acclimate to your home?s environment for at least 48 hours. This step is vital to prevent expansion or contraction after installation due to temperature and humidity changes.
Installation Process
Subfloor Preparation
Ensure the subfloor is clean, dry, and level. Remove any existing carpet or old flooring material. Patch any holes or cracks, and verify the surface is smooth to avoid imperfections in the laminate surface.
For a detailed guide on subfloor preparation, find out more about this approach.
Laying the Underlayment
An underlayment is essential for providing a moisture barrier, sound insulation, and added comfort. Roll out the underlayment across the subfloor, ensuring no gaps or overlaps occur.
Installing the Laminate Planks
Begin installation from the left corner of the room, laying the planks parallel to the longest wall. Use spacers to maintain an expansion gap of 1/4 inch from the wall. Connect the planks using the click-lock system, tapping them gently with a mallet and tapping block for a snug fit.
Cut the final plank in each row as required, ensuring to stagger the joints by at least 12 inches for visual appeal and structural integrity.
Finishing Touches
Once all planks are installed, remove the spacers and install baseboards or moldings to cover the expansion gap. This provides a neat finish and secures the flooring in place.
For comprehensive advice on laminate flooring finishing, learn about our tailored solutions.
Maintenance Tips
- Use a damp mop for regular cleaning.
- Avoid using abrasive cleaning tools.
- Place rugs or mats at entry points to minimize dirt and grit accumulation.
Proper maintenance enhances the longevity of your laminate flooring, ensuring it remains a stunning feature of your home for years to come.